
There is nothing better than having the perfect linear actuator tailored to your project’s exact specifications. Whether you’re tinkering with automation or looking to design a custom window opener for domestic use, off-the-shelf options might not always fit the bill.
If you’re not afraid of getting your hands in, consider creating your own DIY linear actuator at home. The benefits are two fold: not only do you have total customization control but you’ll also save money compared to buying expensive pre-made options.
In this blog post we’ll guide you through the process of building a high quality linear actuator step by step. With insider tips and practical tricks at every turn we guarantee success in creating a precision driven solution.
How to Make a Linear Actuator at Home
We will now explain how to construct a robust linear actuator which you can test out and use use for your personal projects. Here you go.
Tools required
- Welder (optional)
- Hacksaw (a junior hacksaw will suffice)
- Flat-head screwdriver
- Vice (a hobby vice works well)
- Mitre block
- Hammer
- Metal file
Materials Required
- Epoxy resin (such as Araldite)
- Threaded rod (M10 size)
- Nuts (M10 size)
- Piece of clothes rail
- Clothes rail holder
- DC motor or cordless drill with forward and reverse capabilities
- Petroleum jelly
Step 1: Choosing the Drive Method
What type of drive do you have on hand? This is the first and most important component for building a linear actuator. A 12V DC motor, cheap windshield wiper motors, or a cordless drill that reverses its spin direction will suffice.
The cordless drill offers the advantage of having a chuck to center the components.
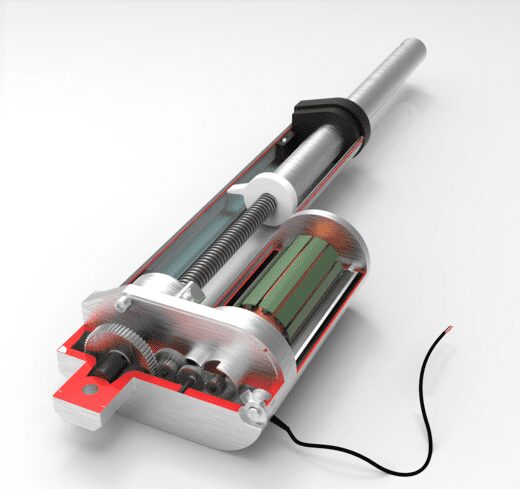
Step 2: Inner Rod
For the inner rod, simply cut the threaded rod to the desired length, allowing enough to fit into the drill’s chuck. If using a DC motor, weld a nut centrally onto the drive wheel from the machine motor.
Thread the rod into the nut tightly and weld it together. Apply epoxy resin to ensure a secure connection. Alternatively, you can use a long bolt instead of the nut and rod if it meets the desired length requirements.
Step 3: Outer Casing
The outer casing remains the same regardless of the drive method. Cut the clothes rail to match the length of the threaded rod using a mitre block to ensure a straight cut. Cut slits at the end of the rail, around six in total, to allow the rail to open as the nut is hammered into it.
Hammer the nut into the rail, ensuring it remains level. Apply epoxy resin around the nut and in the slits, taking care not to get any inside the nut where the thread is located.
Allow the epoxy to set for at least 30 minutes before proceeding. Then, apply epoxy resin to the rail holder and insert the other end of the rail into it. Clamp the rail in a vice to ensure a tight fit and let the epoxy resin set.
Step 4: Assemble
Thread the outer casing onto the inner rod, and the assembly is complete. For lubrication, apply petroleum jelly to the rod by mounting it on the motor or in the drill. Use the motor to slowly rotate the shaft while greasing the rod with petroleum jelly.
This will reduce friction and increase the lifespan of the actuator while preventing squeaking.
How Do You Program Linear Actuators?
There are a few different ways to program linear actuators. One way is to use a microcontroller, such as an Arduino. The microcontroller can be programmed to send signals to the actuator that control its movement. Find out more about how to do that.
Another way to program linear actuators is to use a motion controller. A motion controller is a specialised device that is designed to control the movement of actuators. Motion controllers typically have more features than microcontrollers, such as the ability to control multiple actuators simultaneously and to store and playback pre-programmed movement sequences.
How to Program a Linear Actuator Using an Arduino
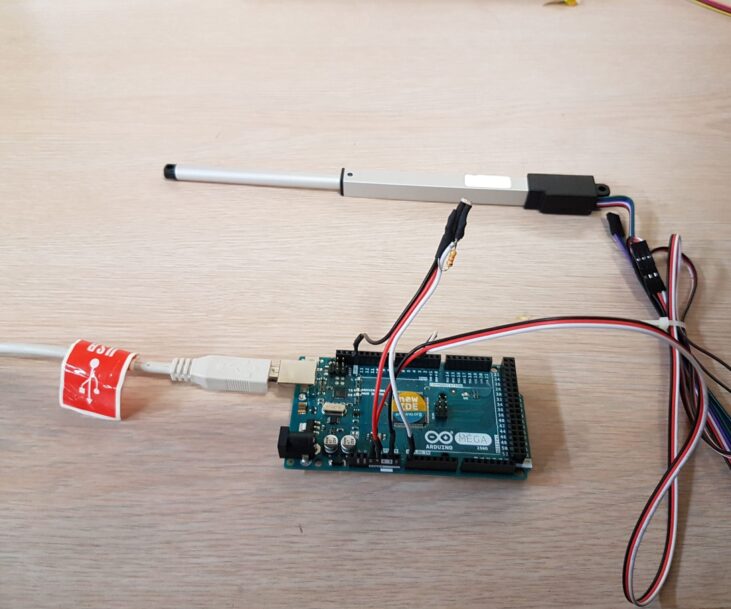
Microcontrollers offer a flexible and accessible platform for programming linear actuators. Arduino, in particular, is widely used due to its user-friendly interface and a vast community of developers.
Here are the steps on how to program a linear actuator using an Arduino.
- Identify the necessary pins on the Arduino board for connecting the actuator. The pins required may vary depending on the actuator and the board model.
- Connect the actuator’s control wires to the designated pins on the Arduino. This typically involves connecting power, ground, and control signal wires.
- Write the code in the Arduino Integrated Development Environment (IDE) that instructs the actuator’s movements. This code will define parameters such as speed, direction, and position.
- Utilize Arduino libraries and functions specific to linear actuators to simplify the programming process.
- Upload the code to the Arduino board, which transfers the instructions to the actuator.
- Power on the Arduino board and ensure the actuator is correctly connected.
- Execute the uploaded code and observe the actuator’s response.
- Fine-tune the code and parameters as necessary to achieve the desired motion.
How to Program a Linear Actuator Using a Motion Controller
Motion controllers are advanced devices designed explicitly for controlling the movement of actuators. They offer more features and functionalities compared to microcontrollers, making them suitable for complex automation tasks.
Here are the steps on how to program a linear actuator using a motion controller:
- Identify the appropriate ports or connectors on the motion controller for connecting the linear actuator. These ports may vary based on the controller model and actuator specifications.
- Connect the actuator to the motion controller by plugging in the respective control wires.
- Access the configuration settings of the motion controller through its user interface or software.
- Define the parameters specific to your actuator, such as speed, acceleration, and position limits.
- Adjust the motion control settings based on your project requirements and desired motion profile.
- Ensure the motion controller is powered on and connected to the actuator.
- Execute the configured motion sequence or commands through the controller’s interface.
- Observe the actuator’s response and make necessary adjustments to the configuration until the desired movement is achieved.
No matter which method you choose, it is important to follow the manufacturer’s instructions carefully when programming linear actuators. This will help to ensure that the actuator is operated safely and that it does not damage itself or other equipment.
How Do I Choose the Right Linear Actuator for My Application?
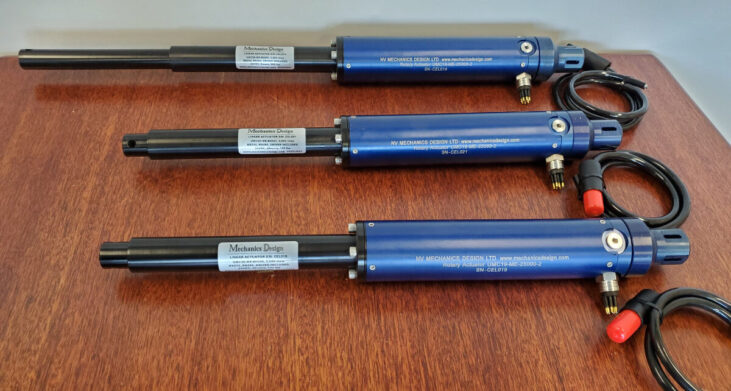
There are many factors to consider when building a linear actuator for a project. Here are some of the most important ones:
- The weight of the object that the linear actuator will be moving. The linear actuator must be strong enough to move the object without breaking.
For instance, if you intend to use it to open and close ventilation openings at home, the actuator should be strong enough the hold the ventilator open in the presence of wind gusts.
- The distance that the linear actuator will need to move. The linear actuator must be long enough to move the object the desired distance. So first, determine how far the actuator needs to extend or retract to fulfill its intended purpose.
- The speed at which the linear actuator needs to move. The linear actuator must be able to move the object at the desired speed.
Some applications may require rapid movements, while others may necessitate slower and more controlled motion. Understanding these requirements will help you pick the right drive.
- Consider how the actuator will be mounted and integrated into your application. Assess the available space and mounting options, as well as the actuator’s physical dimensions and mounting compatibility.
Once you have considered these factors, you can start to design and build your linear actuator.
How to Save Costs In Your Linear Actuator Setup?
There are a few ways to save costs while building your own linear actuator:
- Use recycled materials: If you have access to recycled materials, you can use them to build your linear actuator. This is a great way to save money and reduce your environmental impact.
- Use 3D printing: 3D printing is a great way to create custom parts for your linear actuator. This can save you a lot of money on the cost of parts, and it can also allow you to create parts that are not available commercially.
- Plan your build carefully: Before you start building, take some time to plan out your project. This will help you to avoid making costly mistakes.
- Use a budget: Set a budget for your project and stick to it. This will help you to stay on track and avoid overspending.
- Shop around for parts: Compare prices from different suppliers before you buy your parts. This will help you to find the best deals.
Conclusion
Building your own DIY linear actuator can greatly enhance the efficiency and satisfaction of your project.
However, this is just the beginning of your exploration into the world of linear actuators for personal projects. To further expand your knowledge and expertise, we encourage you to delve deeper into additional resources.
Explore websites, forums, and communities dedicated to DIY projects and automation. By doing so, you’ll discover innovative ways to optimize your DIY projects and achieve even greater levels of automation.


